Implements
The data review starts by clicking on the main menu Resources. Clicking on the submenu Implements, opens a window on the right in wich all entered items are displayed.
 Figure 1: List of Implements
At the top of the window, there are the following tools:
- Add icon (Figure 1, marked with 1) – Clicking on the icon + will open the form for entering data. The user enters required data in the form and creates a new implement by clicking on Add button.
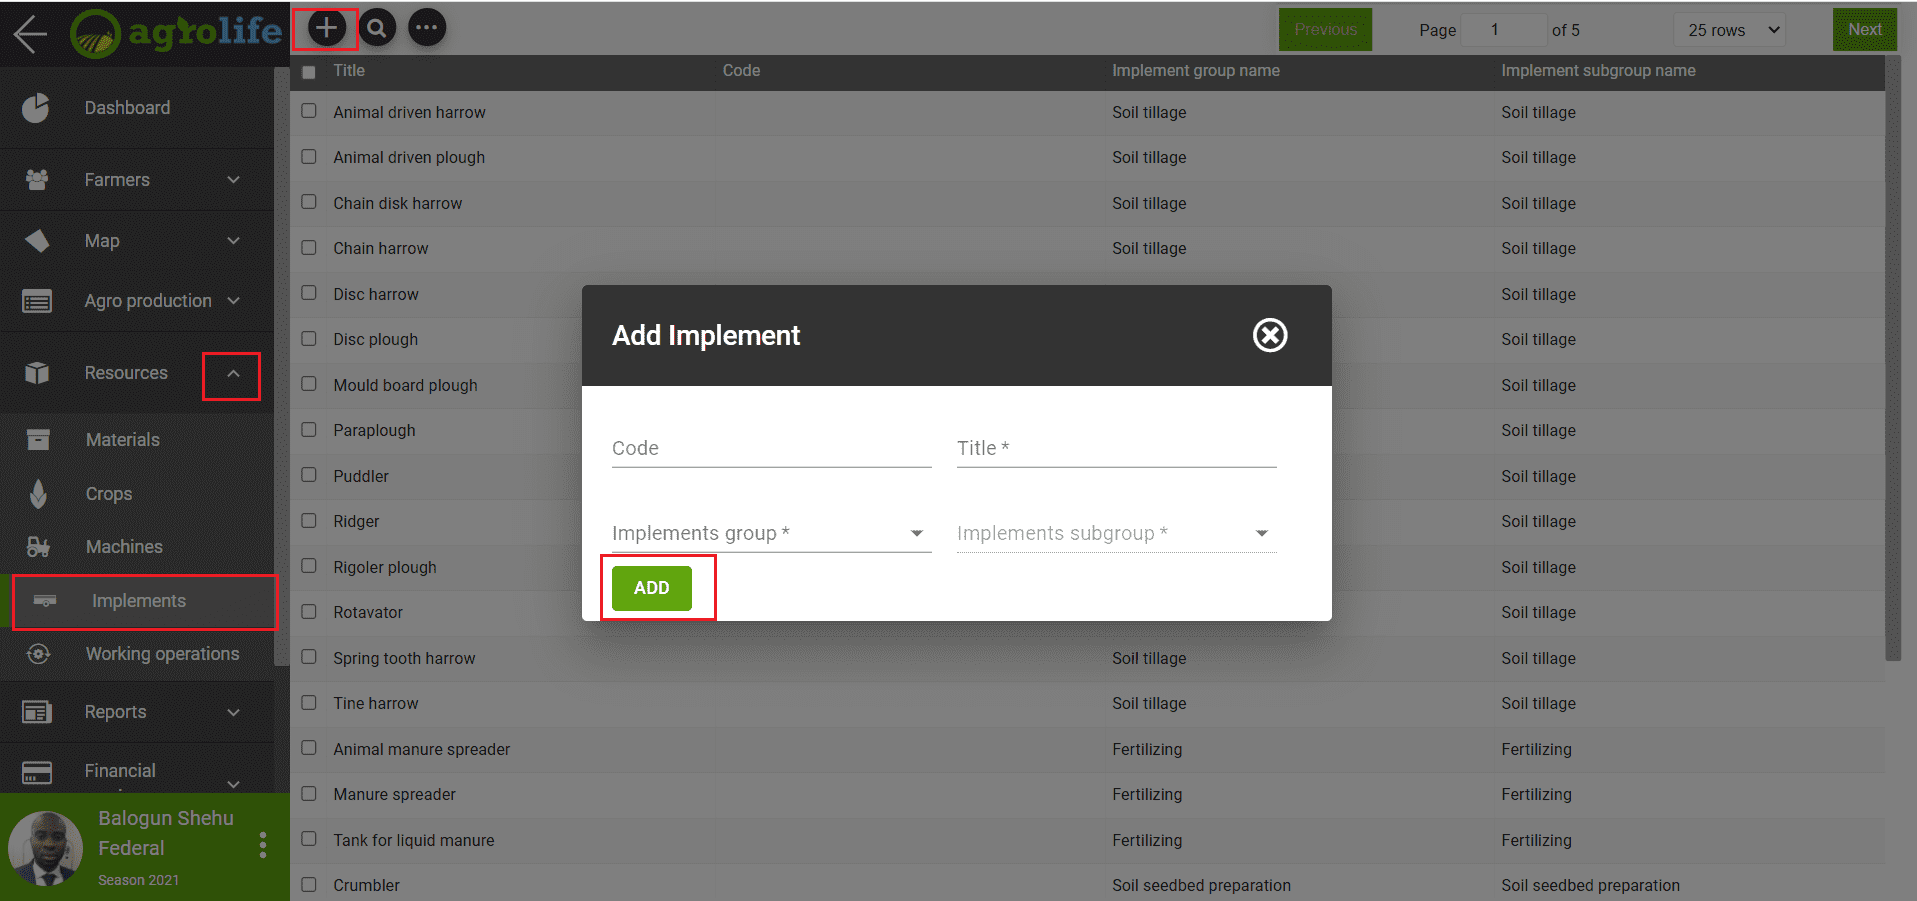 Figure 2: Adding implement
- Search – (Figure 1, mark with 2) Click on the search icon, it is possible to search by different criteria.
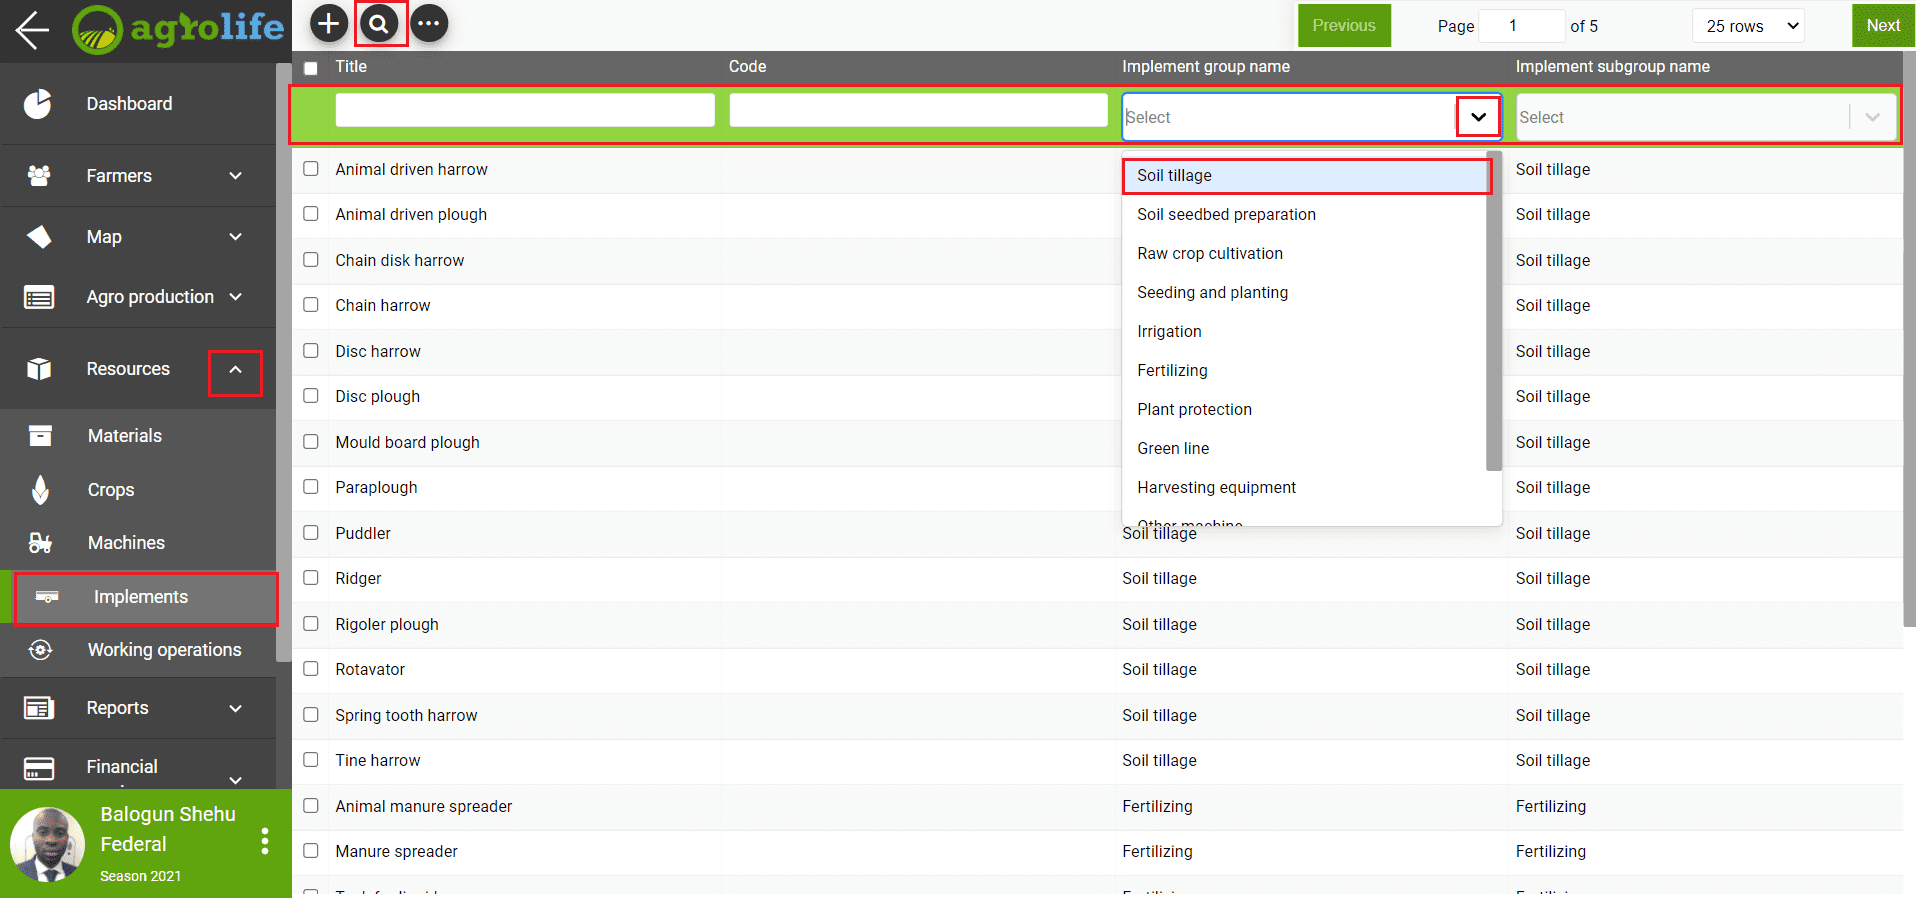 Figure 3: Search implement
- Implements grouping – Selecting the appropriatematerial is facilitated by crestin groups and subgroups of implements. By clicking on the icon next to the search icon (Figure 1, marked with 3), the user slects the implements grouped into groups and subgroup.
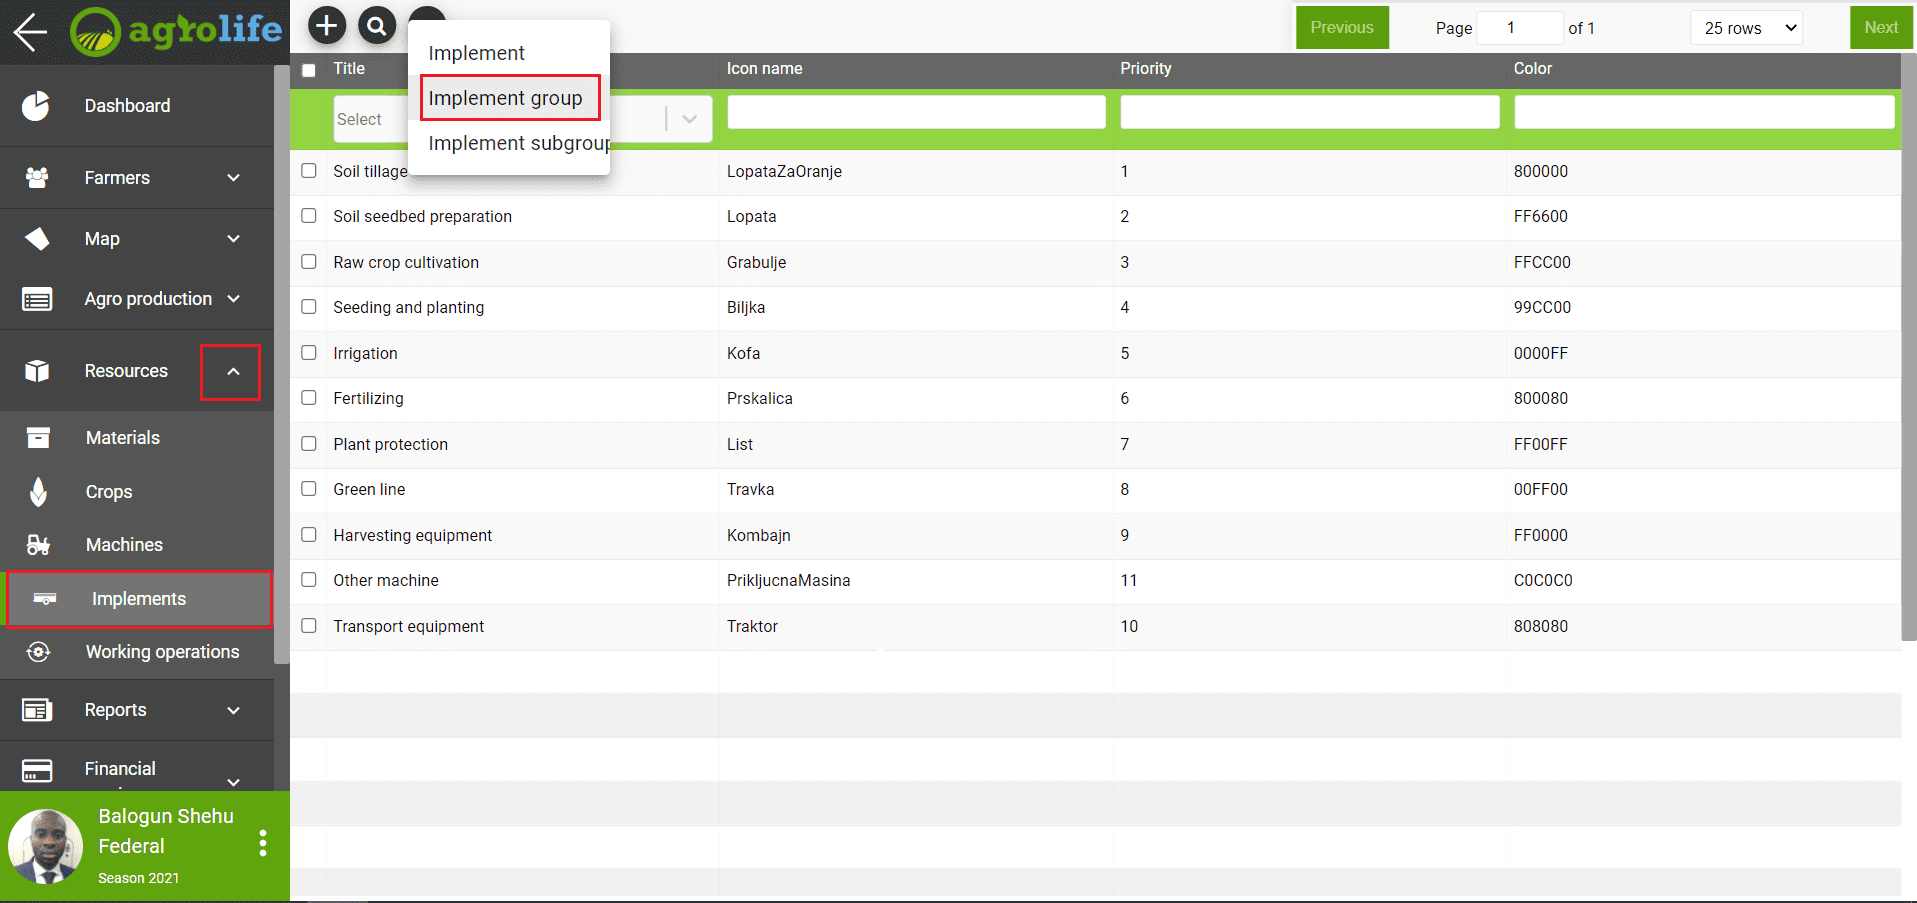 Figure 4: Grouping implement
Selecting, editing and deleting
By selecting one row ( click on the checkbox to the left of the name of implement), two new icons appear at the top of the screen: Delete icon (Figure 5, marked with 4), and Edit icon (Figure 5, marked with 5). Note: It is important to note that selecting the implements is done by clicking on a checkbox as it’s shown on figure 5. Just clicking on the implements row will not select the implements.
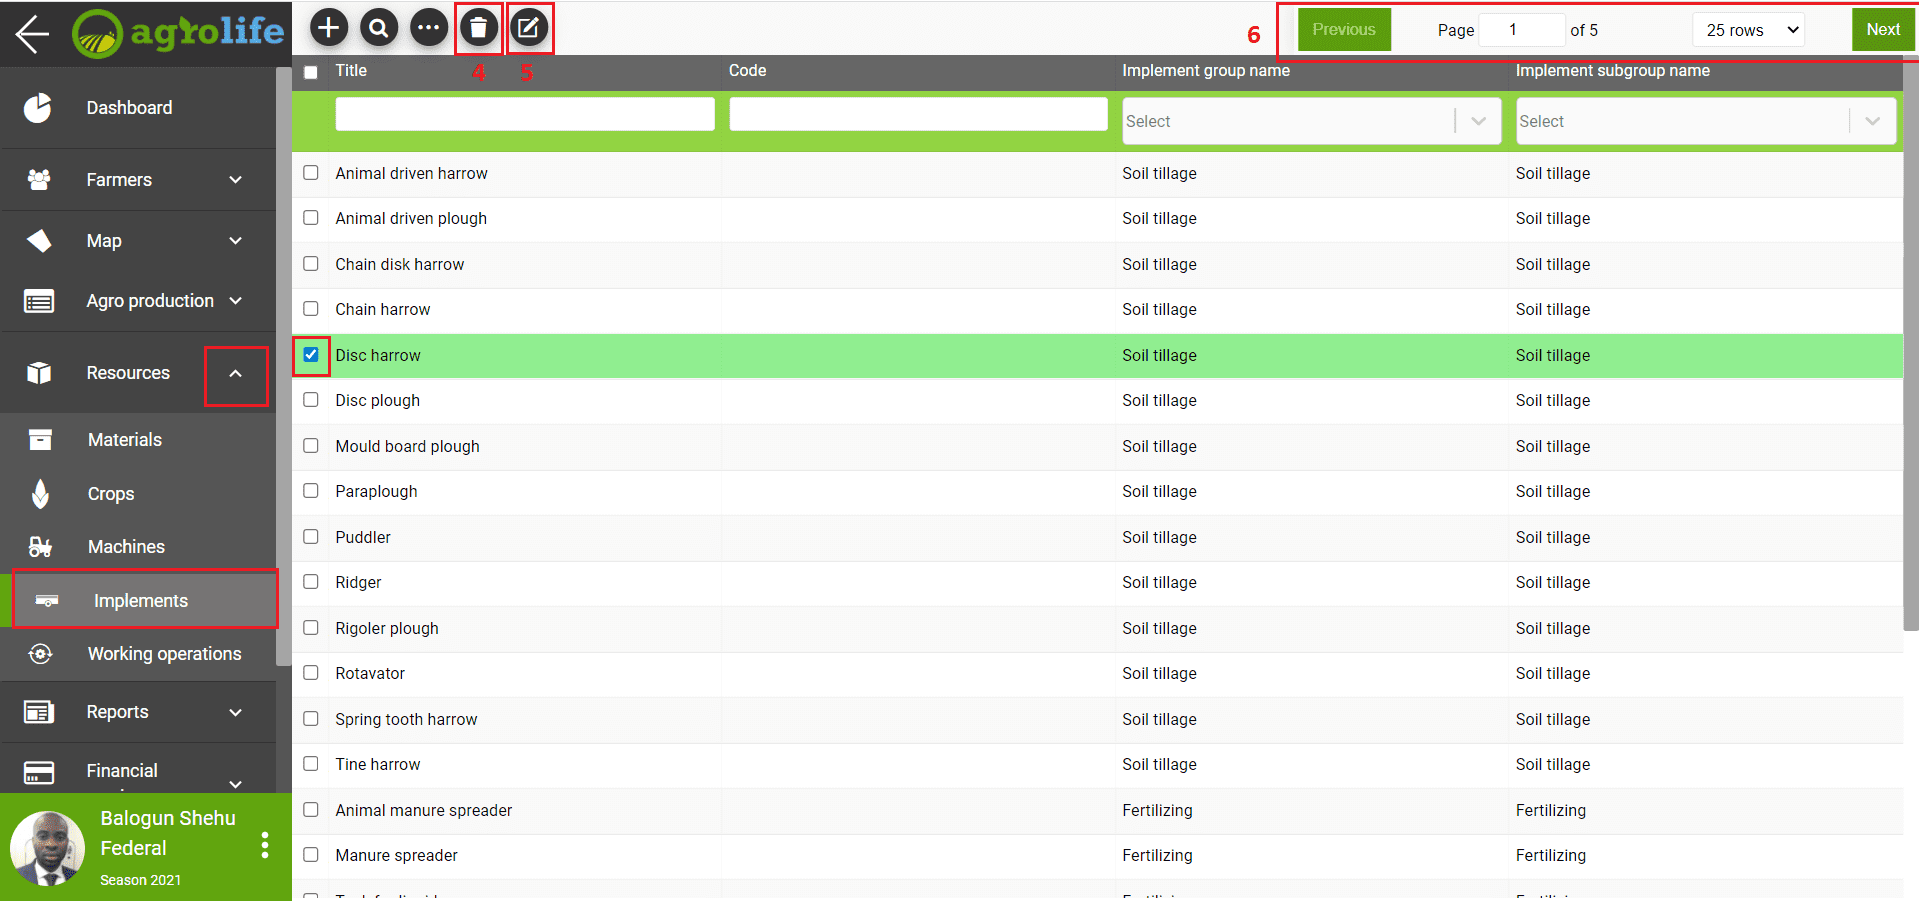 Figure 5: Selecting
- Delete icon - (Figure 5, marked with 4)- By clicking on the delete icon and confirme operation. The operation is canceled by clicking the button Cancel.
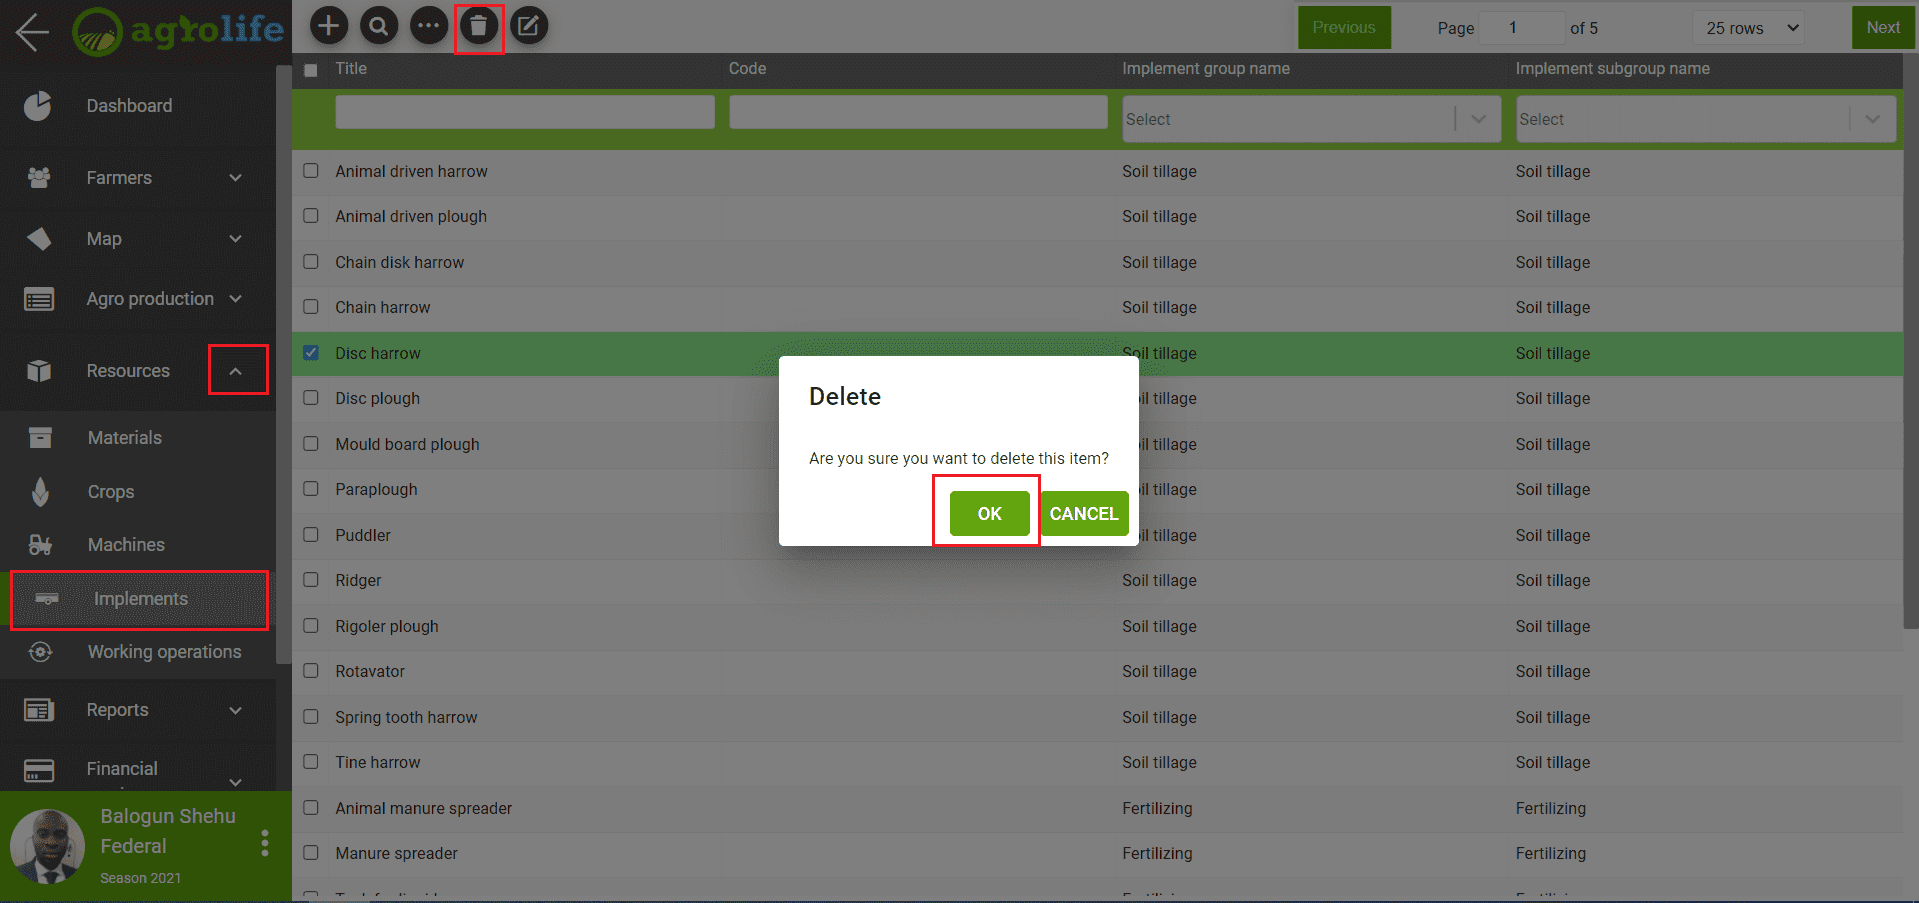 Figure 6: Deletion form
- Edit icon - (Figure 5, marked with 5)- By clicking on the edit icon, the Form for changing the entered data appears. The user enters required data in the form and finishes editing by clicking on Save button.
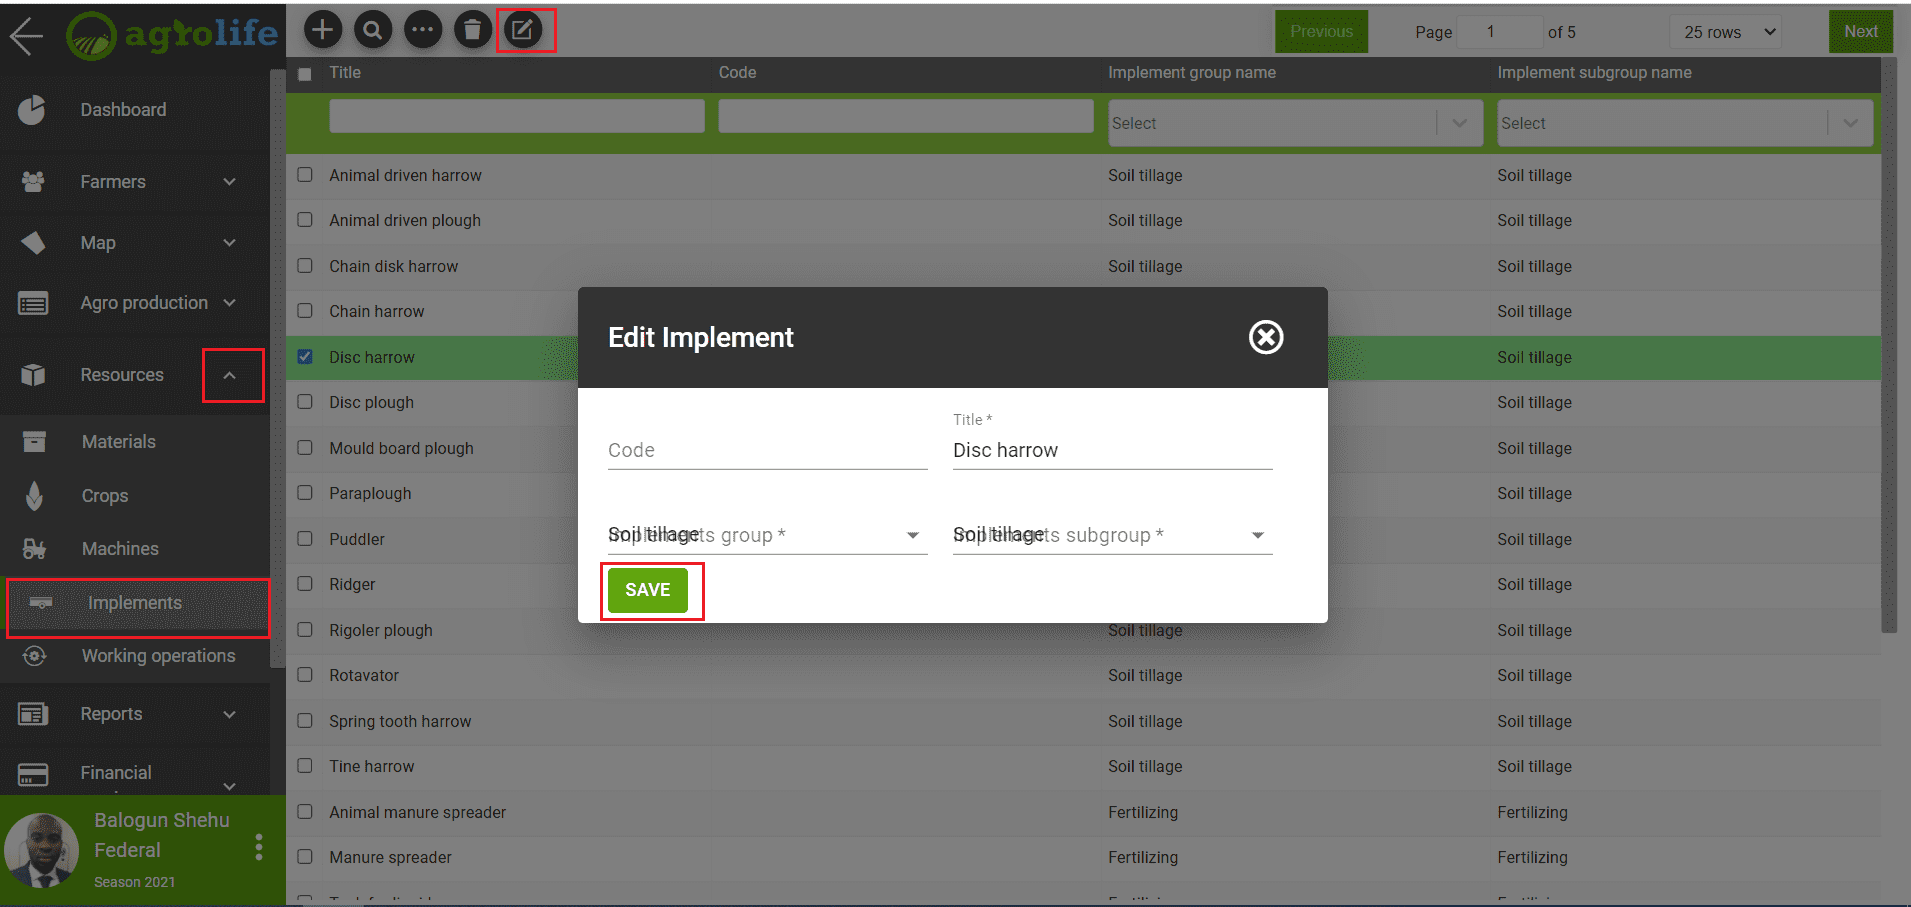 Figure 7: Editing form